DIY Wall Art Tutorials: Easy Ways to Decorate Your Walls
1. Geometric Painted Canvas Art: A Modern Masterpiece
Transform a blank canvas into a striking geometric artwork. This project offers endless customization options based on color palettes and geometric shapes.
- Materials: Canvas (various sizes), painter’s tape, acrylic paints (various colors), paintbrushes (various sizes), ruler, pencil.
- Process:
- Lightly sketch your desired geometric pattern onto the canvas using a pencil and ruler. This serves as a guideline for your taping.
- Apply painter’s tape along the lines you’ve sketched, ensuring clean, crisp edges. Press the tape firmly to prevent paint bleeding.
- Choose your first color and carefully paint within the taped-off sections. Use smooth, even strokes for a professional finish. Let the paint dry completely.
- Apply a second coat of paint if necessary to achieve full color coverage.
- Once the paint is completely dry, carefully peel off the painter’s tape at a 45-degree angle to reveal the clean geometric lines.
- Repeat steps 3-5 with different colors for each geometric section.
- Allow the finished painting to dry completely before hanging.
- Tips: Experiment with different tape widths for varied line thicknesses. Consider using metallic paints for added visual interest. Create a color gradient by blending colors within sections. Search for “geometric art templates” online for inspiration.
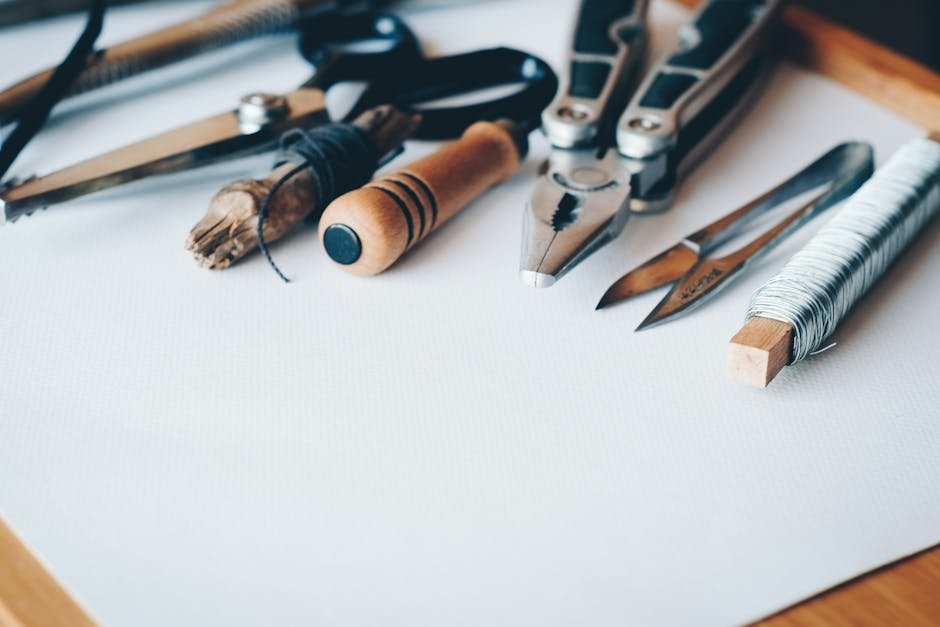
2. String Art: Textural and Trendy
String art creates a captivating three-dimensional effect, perfect for adding texture and personality to any room.
- Materials: Wooden board (any size), nails (small and evenly spaced), hammer, yarn or embroidery floss (various colors), scissors, printout of desired design (optional).
- Process:
- If using a design, print it out and attach it securely to the wooden board.
- Hammer nails into the board along the lines of the design, spacing them evenly apart. Ensure the nails are driven in securely but not too deep.
- Once all the nails are in place, carefully tear away the paper design.
- Tie the end of your chosen yarn or floss to one of the nails.
- Begin wrapping the yarn around the nails, creating a web-like pattern. There’s no right or wrong way to do this; experiment with different wrapping techniques.
- Continue wrapping the yarn until the desired fullness and pattern are achieved.
- Tie off the end of the yarn to a nail and trim the excess.
- Repeat with different colors of yarn for a more vibrant effect.
- Tips: Use a template with simple shapes initially. For more complex designs, pre-drill small holes before hammering the nails to prevent the wood from splitting. Use varying yarn thicknesses and textures for added depth.
3. Pressed Flower Art: Natural Beauty Preserved
Preserve the beauty of nature by creating stunning pressed flower art. This project is ideal for showcasing seasonal blooms or creating personalized gifts.
- Materials: Flowers and leaves (various types), heavy books, blotting paper or newspaper, frame (with glass), craft glue, tweezers.
- Process:
- Gather your flowers and leaves. Ideally, press them as soon as possible after picking to prevent wilting.
- Place a sheet of blotting paper or newspaper on a flat surface. Arrange the flowers and leaves on top, ensuring they don’t overlap.
- Cover with another sheet of blotting paper or newspaper.
- Place several heavy books on top of the blotting paper to apply pressure.
- Leave the flowers to press for 2-3 weeks, or until they are completely dry and flattened. Replace the blotting paper every few days to prevent mold.
- Once the flowers are pressed, carefully arrange them on a piece of paper or cardstock to create your desired design.
- Use a small amount of craft glue to secure the flowers in place. Use tweezers to handle delicate petals.
- Place the finished artwork in a frame with glass to protect the pressed flowers.
- Tips: Choose flowers with naturally flat shapes. Pressing flowers in a microwave oven with cardboard and paper towels can speed up the process. Seal the back of the frame to prevent moisture from damaging the artwork.
4. Watercolor Wash: Abstract Elegance
Create a dreamy, abstract watercolor wash on canvas or watercolor paper. This technique is perfect for beginners and allows for spontaneous creativity.
- Materials: Canvas or watercolor paper, watercolor paints (various colors), paintbrushes (various sizes), water, palette or mixing tray, masking fluid (optional).
- Process:
- Wet your canvas or watercolor paper with clean water. This will help the watercolor paints blend smoothly.
- Load your paintbrush with watercolor paint and begin applying it to the wet surface.
- Experiment with different colors and brushstrokes to create a unique wash effect. Allow the colors to blend and bleed into each other naturally.
- Tilt the canvas or paper to encourage the watercolor paints to flow and create interesting patterns.
- If desired, use masking fluid to protect certain areas of the canvas or paper from the watercolor paint. Remove the masking fluid once the paint is dry.
- Allow the watercolor wash to dry completely.
- Tips: Use high-quality watercolor paints for vibrant, long-lasting colors. Practice on scrap paper before painting on your final canvas. Layer different colors to create depth and dimension.
5. Fabric Scrap Collage: Textural and Sustainable
Repurpose fabric scraps into a unique and textured wall art piece. This project is perfect for using up leftover materials and adding a bohemian touch to your decor.
- Materials: Canvas or wooden board, fabric scraps (various colors, patterns, and textures), scissors, fabric glue or Mod Podge, paint (optional), embellishments (buttons, beads, lace, etc.).
- Process:
- If desired, paint the canvas or wooden board with a base color. Let it dry completely.
- Cut or tear the fabric scraps into various shapes and sizes.
- Arrange the fabric scraps on the canvas or board to create your desired design. Experiment with different layouts until you’re satisfied.
- Once you’re happy with the arrangement, begin gluing the fabric scraps in place using fabric glue or Mod Podge. Overlap the pieces slightly to create a layered effect.
- Add embellishments such as buttons, beads, or lace for added texture and visual interest.
- Allow the collage to dry completely.
- Tips: Use a variety of fabric textures and patterns for a more dynamic collage. Consider creating a specific theme or color palette. Seal the finished collage with Mod Podge for added durability.
6. Photo Tile Wall: Personalized Memories
Create a personalized photo tile wall to display your favorite memories in a visually appealing way.
- Materials: Square ceramic tiles (various sizes), Mod Podge, printed photos (sized to fit the tiles), foam brush, clear acrylic sealant (optional).
- Process:
- Print your chosen photos in the correct size to fit your ceramic tiles.
- Apply a thin, even layer of Mod Podge to the surface of one tile.
- Carefully place a photo on top of the Mod Podge, smoothing out any air bubbles with your fingers or a soft cloth.
- Allow the Mod Podge to dry completely.
- Apply a second layer of Mod Podge over the photo to seal it and protect it from moisture.
- Allow the Mod Podge to dry completely.
- Repeat steps 2-6 for all of your tiles.
- If desired, apply a clear acrylic sealant to the tiles for added protection.
- Arrange the photo tiles on your wall using adhesive strips or tile adhesive.
- Tips: Choose photos with consistent color tones for a cohesive look. Experiment with different tile sizes and arrangements. Consider using black and white photos for a classic feel.
7. Washi Tape Wall Art: Temporary and Trendy
Washi tape is a versatile and affordable material for creating temporary and trendy wall art. It’s perfect for renters or anyone who likes to change their decor frequently.
- Materials: Washi tape (various colors and patterns), scissors or craft knife, ruler or measuring tape, pencil (optional).
- Process:
- Plan your design. You can create geometric patterns, stripes, words, or even entire murals.
- Measure and mark the desired location of your washi tape design on the wall using a ruler or measuring tape and a pencil.
- Apply the washi tape to the wall, following your measurements and design. Press the tape firmly to ensure it adheres properly.
- Use scissors or a craft knife to trim any excess tape.
- Experiment with different colors, patterns, and widths of washi tape to create a unique and eye-catching design.
- Tips: Use painter’s tape as a guide for creating straight lines. Layer different colors and patterns of washi tape for added depth. Washi tape is easy to remove and reposition, so don’t be afraid to experiment.
8. Repurposed Pallet Art: Rustic Charm
Transform a discarded wooden pallet into a rustic and charming piece of wall art. This project is perfect for adding a touch of farmhouse style to your home.
- Materials: Wooden pallet, sandpaper, paint or stain (optional), stencils or freehand drawing supplies, nails or screws, picture hanging hardware.
- Process:
- Sand the wooden pallet to remove any rough edges or splinters.
- Paint or stain the pallet to your desired color. Let it dry completely.
- Use stencils or freehand drawing to create a design on the pallet. You can paint a quote, a picture, or a simple geometric pattern.
- Attach picture hanging hardware to the back of the pallet.
- Hang the pallet on your wall using nails or screws.
- Tips: Disassemble the pallet and rearrange the boards for a different look. Use reclaimed wood for a truly rustic feel. Seal the finished artwork with a clear coat to protect it from the elements.
9. Macrame Wall Hanging: Bohemian Elegance
Add a touch of bohemian elegance to your home with a handmade macrame wall hanging. This project requires some basic knotting skills but is relatively easy to learn.
- Materials: Macrame cord (various colors and thicknesses), wooden dowel or branch, scissors, measuring tape.
- Process:
- Cut the macrame cord into desired lengths, depending on the size of your wall hanging.
- Attach the cords to the wooden dowel or branch using a lark’s head knot.
- Use a variety of macrame knots, such as square knots, half square knots, and clove hitch knots, to create your desired pattern.
- Continue knotting until the wall hanging reaches your desired length.
- Trim the ends of the cords evenly.
- Hang the macrame wall hanging on your wall.
- Tips: Learn basic macrame knots online or in a book. Use a macrame board to keep your cords organized. Experiment with different knot combinations to create unique textures and patterns.
10. Mirror Mosaic: Reflective Radiance
Create a dazzling mirror mosaic wall art piece to add light and dimension to any room.
- Materials: Mirror tiles (various shapes and sizes), strong adhesive (mirror adhesive), plywood or MDF board (for backing), grout (optional), safety glasses, gloves.
- Process:
- Cut the plywood or MDF board to the desired size and shape for your mosaic.
- Carefully arrange the mirror tiles on the board to create your design. Experiment with different layouts before applying adhesive.
- Wearing safety glasses and gloves, apply a small amount of mirror adhesive to the back of each tile.
- Press the tile firmly onto the board, holding it in place for a few seconds until the adhesive sets.
- Continue adhering the tiles until the entire board is covered.
- Allow the adhesive to dry completely according to the manufacturer’s instructions.
- If desired, apply grout between the tiles to fill in the gaps and create a more finished look.
- Wipe away any excess grout with a damp sponge.
- Allow the grout to dry completely.
- Hang the mirror mosaic on your wall using appropriate hanging hardware.
- Tips: Use pre-cut mirror tiles to save time and effort. Wear safety glasses and gloves to protect yourself from broken glass. Choose a strong adhesive specifically designed for mirrors.